
To save you from having to refer to two guides at once, I'm going to re-hash a lot of what I said in my original Newbies Guide to Version Control. The main difference here is that the old guide is written to work with the repositories at Github.com. The problem with that is that you can only use public repositories for free at Github, while at their competitor Bitbucket you can make private repositories for free. This is obviously a desirable feature for game development.
Enough talk, on to the guide!
What Is Version Control?
Version control is a way of tracking the changes you make to a project over time. Using a version control system such as Git, you can see a list of all previous versions of your project, and roll back to a previous version with ease. You can also "fork" your project to work on a separate instance of it, then merge it back together. Version control also works well in group projects because you can see exactly who made what changes, which can be very helpful when you need to ask someone about a piece of code. Additionally, version control systems usually support a remote repository - a place where the code is hosted online, which allows a group to share their work easily, and can also serve as an extra back up should local storage fail.
In this guide, the version control system we'll be looking at is called Git. The online repository hosting site we'll be using is called Bitbucket. Both are completely free to use, and with the desktop Github GUI, are quite easy.
Why Do I Need Version Control?
Version control is vital to developers, and anyone who likes to keep multiple versions of their work. Have you ever made a major change to something, only to find you really liked it better before? Did the most recent update from the programmers completely break the game, with no way restore it to how it was before? With version control, it's very simple to roll back changes or to integrate stuff you deleted in a previous version. Many people, before version control, did this by keeping multiple copies of their project locally on their computer - but this quickly becomes a disk space hog and also can be quite confusing. Version control systems like Git don't keep full copies of the project but instead keep track of differences, in a long line of differences going back to the original commit. This means that while the same information is saved, you don't have nearly as much space taken up by useless older versions of the project.
Version control with a remote repository has the added bonus of keeping you safe from hard drive failure, as it serves as a backup. Additionally, it is ideally suited to group work, giving a place to share work and a way to track who has done what. Bitbucket has many other features that help with group work, including issue tracking where tasks can be set and assigned, and a wiki where members can contribute and read documentation.
Installing the Github GUI
To get started, we'll need the Github GUI (the front end program we'll be using) and a Bitbucket account.
- Download the Github GUI from...
Windows: http://windows.github.com/
Mac: http://mac.github.com/ - Create a free Bitbucket account: https://bitbucket.org/account/signup/
You are now set up and ready to create your first repository! I'll guide you through this by making a sample repository with you.
Creating Your First Repository
Now that we have everything installed, it's time to create our first repository! We'll do this using the Bitbucket website. Once you log in, you'll be taken to your dashboard. In the upper right corner is a button "Create Repository". Click it.

Enter a name for your repository. I'll use "Tutorial" as the name for mine. When you name your projects in the future, make sure they are descriptive names so you and your colleagues can easily find the repository you're looking for.
Enter a description. This is also important as it's the first thing strangers or team mates might look at to learn more about your project. For my example I'll describe it as: "A simple repository for learning how to use github."
The rest of the options can be left at default, though you can check to add a wiki and issue tracker if you like (you can always add these later too!). When everything is filled out to your satisfaction, click "Create Repo".

You'll be greeted with a page full options for managing your repo. What we need to get started is the address for your git repo. On the overview, click "Getting Started" and "I'm starting from scratch".

This will take you to a page showing some terminal commands to use git to clone this repo and get started. Sounds complicated? That's okay, we're not gonna do that! Instead, open up the Github GUI you downloaded earlier. When you first open it, you'll be asked to do a one-time setup. You can skip entering a GitHub account (you don't need one to use this application with Bitbucket) but you do need to put in your name and email as these will be used to identify you in your commits. You can always change this stuff later in the application's settings.
When you're done, you'll see something like the picture below.

Now, in this screenshot I have three existing local repositories. Your right hand side of the window will be significantly more empty. You also probably don't have a GitHub account logged in like I do. That's fine - you won't need one.
The next step may seem a little odd, but it is the simplest way to get your bitbucket repo working with Github. First, move your Github window off to one side of the screen, then bring your bitbucket website window up on the other side of the screen. Still on that same page we got to above with the terminal commands? Good. The last command has an address in it. That's your repo's address. Highlight it, then drag it across to Github's window.

GitHub will create an empty repository for you, since the address points to an empty one. If you already had stuff up there when you dragged it across, it would download it and show you the repository history here.
You will also be asked for your Bitbucket username and password. Once you type them in, GitHub can remember them so you don't have to do it again.
Congratulations! You have created your repository on your local computer and on your remote repo on Bitbucket. Now you just need to fill it with stuff.
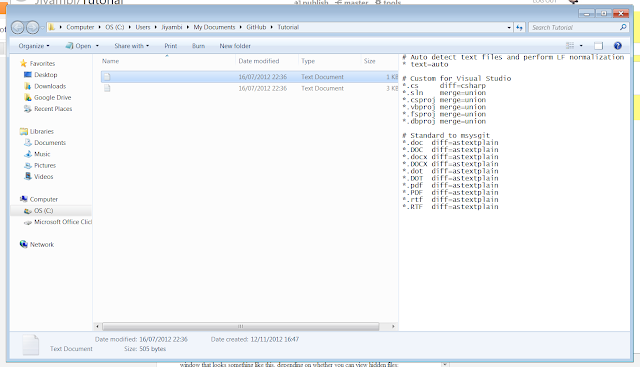
Next up, we're going to add a readme.txt for the repo. Doing this allows people browsing your repo to easily see what your project is all about. So lets get to that! Right-click the repo and choose "open in explorer". You should get a window that looks something like this, depending on whether you can view hidden files:
Let's create a simple readme.txt to start us off. Create a new .txt document (you can right click the folder and select New -> Text Document). Name it readme.txt and put some text inside. Typically you want the readme to be a nice summary of your project, and you may want to include author names, copyright or license information, version details, and things like that.
Click the arrow next to the Tutorial repository listing (you can also right-click and select "open") to open the repository. You should see something like this:
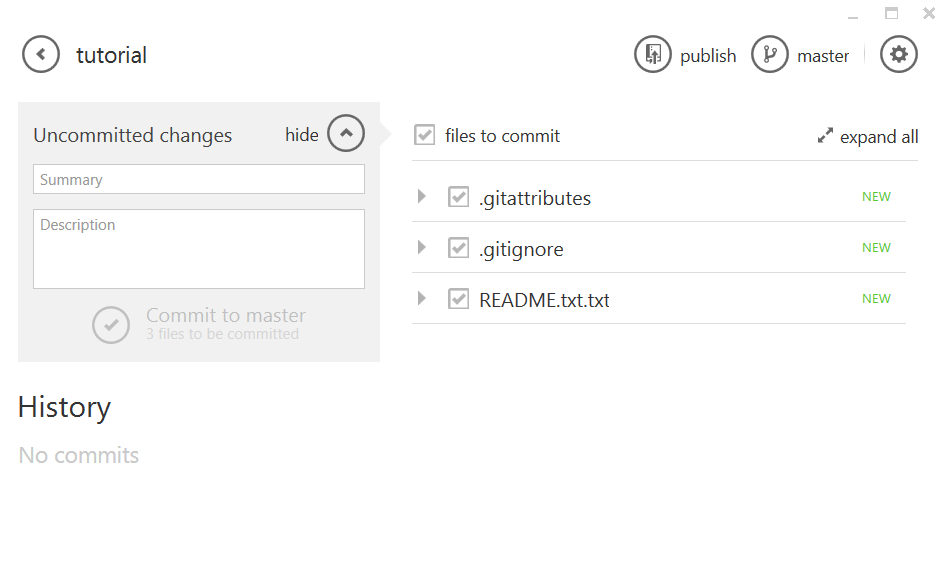
This is the repository view. The files are listed on the right, with the history of the repository on the lower left, unsynced changed above that, and the current commit message at the top left. Right now we have only a few files, and no history or unsynced changes. You'll notice that there is a little "new" message next to our three files - the program is telling us that these files were not previously part of the repository. On the left of those files, you also see a check box. Generally you want to leave this checked - this tells the program that we want these changes to be part of our commit.
Lets go ahead and make our first commit. Type in a commit message. Often with the first commit you just want something like "Initial commit" - but always try to make the message as descriptive but succinct as possible (a few words only). You can put more details in the extended description as needed. When you're done, hit "Commit to master"!
You'll notice the window has changed, it will now look something like this:

On the left, we now have an entry in "unsynced commits" - the commit you just made. If you select it, the left side will now show the changes that were made during that commit. This is very handy since you can go back and look at when certain changes were made. You can roll back to a previous commit using this interface by clicking one of the two buttons at the top - either "revert commit" to reverse the changes made by the commit, or "roll back to this commit", which reverts back to a state just after this commit was made. Both would be silly at the moment, but can be very useful for long-term projects.
Let's go ahead and upload our change to the remote repository on Bitbucket. This is very easy to do! Just click "publish" at the top of the window - normally this will say "sync" but since this is our very first commit for this repo, it will read "publish". It will take a moment to upload, then the "publish" command will change to "in sync", meaning your local repository matches the remote one. Always check for this when preparing to work, especially when working on a group project. You'll also notice your commit has moved from "unsynced commits" down to "history" - meaning it is now part of the Bitbucket repository history.
Enter a description. This is also important as it's the first thing strangers or team mates might look at to learn more about your project. For my example I'll describe it as: "A simple repository for learning how to use github."
The rest of the options can be left at default, though you can check to add a wiki and issue tracker if you like (you can always add these later too!). When everything is filled out to your satisfaction, click "Create Repo".
You'll be greeted with a page full options for managing your repo. What we need to get started is the address for your git repo. On the overview, click "Getting Started" and "I'm starting from scratch".
This will take you to a page showing some terminal commands to use git to clone this repo and get started. Sounds complicated? That's okay, we're not gonna do that! Instead, open up the Github GUI you downloaded earlier. When you first open it, you'll be asked to do a one-time setup. You can skip entering a GitHub account (you don't need one to use this application with Bitbucket) but you do need to put in your name and email as these will be used to identify you in your commits. You can always change this stuff later in the application's settings.
When you're done, you'll see something like the picture below.
Now, in this screenshot I have three existing local repositories. Your right hand side of the window will be significantly more empty. You also probably don't have a GitHub account logged in like I do. That's fine - you won't need one.
The next step may seem a little odd, but it is the simplest way to get your bitbucket repo working with Github. First, move your Github window off to one side of the screen, then bring your bitbucket website window up on the other side of the screen. Still on that same page we got to above with the terminal commands? Good. The last command has an address in it. That's your repo's address. Highlight it, then drag it across to Github's window.
GitHub will create an empty repository for you, since the address points to an empty one. If you already had stuff up there when you dragged it across, it would download it and show you the repository history here.
You will also be asked for your Bitbucket username and password. Once you type them in, GitHub can remember them so you don't have to do it again.
Congratulations! You have created your repository on your local computer and on your remote repo on Bitbucket. Now you just need to fill it with stuff.
Making Commits and Syncing
You have a repository now, but it's empty. We'll create a simple text document to demonstrate making commits and syncing.
A commit is when you tell the program to take a snapshot of your project - somewhat like saving a new version. Generally you want to commit after each self-contained change is made. Fix a bug? Make a commit. Add a feature? Make a commit. Error on the side of smaller changes as opposed to massive amounts of differences between commits.
Syncing is when you upload your changes to the remote repository, or download changes from it - when you sync up your local and remote repositories. Always do this before and after you work on the project - before to make sure you have the most current code when you start, and after to make sure your work is uploaded and the remote repo is kept current. This is especially important when working in a group.
Now, on to how to do all that!
You can right-click the repository to get a context menu with several import options.
You can right-click the repository to get a context menu with several import options.
- Open: This opens the repository in the GitHub GUI. We'll use this to make commits in a minute.
- Clone and Clone to...: Use this option to clone a repository from Bitbucket which you don't yet have a local copy for.
- View on github: This is only useful if your repo is on GitHub, which ours is not.
- Open in explorer: This opens a file browser to the repository's local location on your PC. We'll use this in a minute.
- Open a shell here: For advanced users only. This allows you to use powershell to muck about with the repo at this location.
- Stop tracking this repo: This will remove the repo from your list, useful for cleaning up if you no longer want to update a repo. You can always clone it again later.
Real quickly, lets add some useful default files to the repo. These are ".gitignore" and ".gitattributes". These files help keep your repo clean and ignore large, unnecessary binary files for common programs. Open your repository by clicking the right arrow on the far right side of it. Once the repository is open, click the cog icon in the upper right and select "Repository Settings...". Then just click the blue text to add the default .gitignore and .gitattributes files. Finally, check update at the bottom of the window. You'll see your repo with a few new entries - we'll cover what all this means in a minute.

What are those funny invisible files? Those are .gitattributes and .gitignore we added earlier.
Let's create a simple readme.txt to start us off. Create a new .txt document (you can right click the folder and select New -> Text Document). Name it readme.txt and put some text inside. Typically you want the readme to be a nice summary of your project, and you may want to include author names, copyright or license information, version details, and things like that.
Click the arrow next to the Tutorial repository listing (you can also right-click and select "open") to open the repository. You should see something like this:
This is the repository view. The files are listed on the right, with the history of the repository on the lower left, unsynced changed above that, and the current commit message at the top left. Right now we have only a few files, and no history or unsynced changes. You'll notice that there is a little "new" message next to our three files - the program is telling us that these files were not previously part of the repository. On the left of those files, you also see a check box. Generally you want to leave this checked - this tells the program that we want these changes to be part of our commit.
Lets go ahead and make our first commit. Type in a commit message. Often with the first commit you just want something like "Initial commit" - but always try to make the message as descriptive but succinct as possible (a few words only). You can put more details in the extended description as needed. When you're done, hit "Commit to master"!
You'll notice the window has changed, it will now look something like this:
On the left, we now have an entry in "unsynced commits" - the commit you just made. If you select it, the left side will now show the changes that were made during that commit. This is very handy since you can go back and look at when certain changes were made. You can roll back to a previous commit using this interface by clicking one of the two buttons at the top - either "revert commit" to reverse the changes made by the commit, or "roll back to this commit", which reverts back to a state just after this commit was made. Both would be silly at the moment, but can be very useful for long-term projects.
Let's go ahead and upload our change to the remote repository on Bitbucket. This is very easy to do! Just click "publish" at the top of the window - normally this will say "sync" but since this is our very first commit for this repo, it will read "publish". It will take a moment to upload, then the "publish" command will change to "in sync", meaning your local repository matches the remote one. Always check for this when preparing to work, especially when working on a group project. You'll also notice your commit has moved from "unsynced commits" down to "history" - meaning it is now part of the Bitbucket repository history.
We've made our first commit and published our first repo to the remote repository! Let's make a quick change so you can see how the differences look. Open up the file browser again and edit the readme.txt in some way - add a few more lines of text (maybe an author section) and modify some of the existing text. Save your changes, and head back to the GitHub GUI window. You should see your changes represented on the left (you may need to click "show" on uncommitted changes at the top right):

As you can see, the changes are represented as lines added or lines deleted. If you change a line, it counts as deleting the old line and adding a new one. Git conveniently tracks line numbers as well, something most programmers should be familiar with.
As you can see, the changes are represented as lines added or lines deleted. If you change a line, it counts as deleting the old line and adding a new one. Git conveniently tracks line numbers as well, something most programmers should be familiar with.
Go ahead and commit your change and sync it with the remote repo.
You now have created a repository, added files to it, published it, made changes, and submitted the changes! That in itself is pretty awesome, but that's not all git offers. Lets go to the website to see what other cool things we can do.
Further Features to Learn
This guide barely scratches the surface of what awesome and useful tools are available through version control, GitHub, and Bitbucket. First of all, you have your Bitbucket website, where you can browse and even edit your source right there in the web browser. There is a very useful wiki and issue tracker, great for documentation, task management, and bug reporting and management. You can create team pages to manage multiple people using the same repos. You can set up downloadable builds of your game to give to your testers.
In addition to the features on the Bitbucket website, git and GitHub's GUI have a ton of other, powerful features I haven't covered here, such as branching, forking, merging, reverts and roll-backs, and the ignore and attributes files. Git is a popular system so there is a lot of documentation out there, but hopefully what I've provided here is useful by itself and a good jumping-off point for future learning.
If you have any questions, feel free to leave a comment here and I'll do my best to answer!
